www.eslgold.com for eng
Hardware for computer
www.talkenglish.com for eng
Friday, November 15, 2013
Sunday, November 3, 2013
Phone အစစ္ဟုတ္၊ မဟုတ္စစ္ေဆးနည္း
အရင္းဆံုးကိုယ္ဖုန္းမွာ ဖုန္းေခၚတဲ့ေနရာမွာ
*#06# ရိုက္လိုက္ရင္ နံပါတ္ 15 လံုးေပၚလာလိမ့္မယ္၊
အဲဒီ နံပါတ္ 15 လံုးကို ဒီဆိုဒ္မွာ ရိုက္ထည့္ျပီး စစ္ေဆးလိုက္ရင္
ကိုယ့္ဖုန္းဟာ ဘာအမ်ိဳးအစား ဆိုတာ ျပပါလိမ့္မယ္။
ဒီအျပင္ ထုတ္လုပ္တဲ့ ႏိုင္ငံကိုယ္ပါ ၾကည့္လို႕ရေသးတယ္
အဲဒီ 15 လံုးမွာ 7+8 လံုးေျမာက္ဂဏန္းကိုၾကည့္ျပီး
ဘယ္ႏိုင္ငံကေနဒီဖုန္းကို ထုတ္လုပ္တယ္ဆိုတာ သိႏိုင္ေသးတယ္။
ဥပမာ. ကိုယ့္ဖုန္းမွာ အဲဒီလိုရိုက္စစ္လိုက္လိုက္လို႔ 7+8 လံုးေျမာက္မွာ 0+4 ျဖစ္ေနရင္
ဒီဖုန္းကို တရုတ္ႏိုင္ငံမွာထုတ္လုပ္တယ္ဆိုျပီးသိရမွာပါ။
ေအာက္မွာျပထားပါတယ္ ႏိုင္ငံနဲ႕ နံပါတ္တြဲေပးထားပါတယ္ စစ္ၾကည့္လိုက္ပါတယ္ေနာ္
10 = Finland also 01 = Finland
20 = Germany or 02
30 = Korea or 03
40 = China or 04
50 = Brazil, USA, Finland or 05
60 = HK, China, Mexico or 06
70 = Finland or 07
80 = Hungary or 08
91 = Finland or 19
Monday, August 26, 2013
Android ဖုန္းအတြက္ ပိဋကတ္သံုးပံု ပါဠိ၊ အ႒ကထာ၊ ဋီကာ ေဆာ့ဖ္၀ဲ online မွာ ယူလို႕ရျပီ
အခုေအာက္မွာေပးထားတဲ့
လင့္ကေန zip ဖုိင္ေလးကို ေဒါင္းလိုက္ပါ အဲဒီ zip ဖိုင္ကို ျဖည့္လိုက္ရင္ apk ဖိုင္နဲ႕
CSP ဖိုဒါ ပါလိမ့္မယ္ ဖုန္းထဲကို ထည့္နည္းကေတာ့ (ဖုန္းက Android version 4.0 အထက္ျဖစ္ဖို႕လိုတယ္
) ဖုန္းထဲကို apk ဖိုင္ကို အင္စေတာလုပ္လိုက္ျပီး
CSP ဖိုဒါကို SD ကဒ္ထဲကို ထည့္ေပးရမယ္ (ဖိုဒါတစ္ခုခုေအာက္မွာ ထည့္လို႕မရဘူး)
SD ကဒ္ထဲကိုထည့္လို႕ အလုပ္မလုပ္ဘူးဆိုရင္ ဖုန္းရဲ႕ Internal Memory ထဲမွာ CSP ဖိုဒါကို
ထည့္ေပးရမယ္
ဒီေဆာ့ဖ္၀ဲကို ေရးသားသူကေတာ့ စိန္ရတနာေက်ာင္းမွ
အရွင္ဣေႏၵာဘာသာ ျဖစ္ေၾကာင္း တဆင့္စကားအရ ၾကားသိရပါတယ္ (ေသေသခ်ာခ်ာေတာ့ မသိရေသးပါ) ဤအရွင္ျဖစ္ေစ တျခားသူျဖစ္ေစ အခုလို သာသနာေတာ္အတြက္
ပိဋကတ္စာေပရွင္မ်ားအတြက္ အဆင္ေျပစြာ ေရးသားတဲ့အတြက္ မ်ားစြာ ေက်းဇူးလည္းတင္ ဂုဏ္လည္းဂုဏ္ယူမိပါတယ္။
အခု ပိဋကတ္ဖုန္းေဆာ့ဖ္၀ဲမ်ားႏွင့္ ကြန္ျပဴတာဗားရွင္း
ပိဋကတ္ေဆာ့ဖ္၀ဲမ်ားကို အႏွိဳင္းမဲ့ႏွင္ စာတိုေပစမ်ား
အဖြဲက ဦးေဆာင္ျပီး ေစတနာရွင္မ်ားရဲ႕ပ့ံပိုးကူညီမႈျဖင့္ ပိဋကတ္စာေပျပန္႕ပြားေရးရည္ရြယ္ခ်က္ျဖင့္
သံဃာေတာ္အရွင္ျမတ္မ်ားထံကိုယ္တိုင္ကိုယ္က် လိုက္လံထည့္ေပးလွဴဒါန္းေနပါသည္။ နယ္ၿမိဳ႕မ်ားသို႕လည္း
စာတိုက္ကေန ပို႕ေဆာင္ျပီး လွဴဒါန္းေနသည္ဟု သိရပါသည္။ (ဤအဖြဲ႕ကိုလည္း ဒီေနရာကပင္ သာသနာေတာ္အက်ိဳးကို
ဒီထက္မက ပံ႕ပိုးကူညီႏိုင္ပါေစလို႕ဆုေတာင္းေမတၱာပို႕သေပးလိုက္ပါသည္)
မိမိလက္၀ယ္သို႕ေရာက္လာေသာအခါ (အင္တာနက္သံုး၍
အဆင္ေျပေသာ) နယ္မွာရွိေနေသာ သူငယ္ခ်င္းမ်ားကိို ေပးခ်င္ေပမယ့္ အဆင္မေျပျဖစ္ေနတာနဲ႕
မိမိ Online ကေနတင္ေပးျပီး ေဒါင္းေလာ့ယူၾကလ်ွင္ အဆင္ေျပလိမ့္မည့္ဟု ေတြးမိေသာေၾကာင့့္
အခုလို တင္ေပးလိုက္ရပါတယ္။ တျခားလိုခ်င္သူမ်ားလည္း အဆင္ေျပလိမ့္မည္ဟု ယူဆမိပါသည္။ ဖိုင္ဆိုဒ္က
CD တစ္ခ်ပ္နည္းပါရွိတဲ့အတြက္ေၾကာင့္ ဖိုင္ဆိုဒ္ကို ျဖစ္ႏိုင္ေျခအရွိဆံုး ခ်ံဳ႕ထားပါသည္။
ဒီထက္ဖိုင္ဆိုဒ္ေသးေအာင္ ခ်ံဳ႕လို႕ရေသာနည္းရွိသည္ဟု သိရေသာ္လည္း တစ္ရက္နည္းပါးစမ္းၾကည့္ေသာ္လည္း
အဆင္မေျပတဲ့အတြက္ေၾကာင့္ 590 MB ကေန 108 MB ေလာက္ဘဲ ျဖစ္ေအာင္ ခ်ံဳ႕ျပီး တင္ေပးလိုက္ရတာပါ။
ဖုန္းထဲ့မွာ ဒီ zip ဖိုင္ကိုျဖည္ခ်င္တယ္ဆိုရင္ 7ziper ကိုသံုးပါ၊ ကြန္ျပဴတာမွာဆိုရင္ေတာ့
winrar winzip တို႕အသံုးျပဳျပီးျဖည့္လို႕ရပါတယ္။
ဒီမွာ ေဒါင္းပါေနာ္
Wednesday, August 21, 2013
Android ဖုန္းကေန Facebook Account အေကာင့္လုပ္မယ္ (လံုး၀ရေစရမယ္ေနာ္)
တကယ္ေတာ့ အေကာင့္လုပ္တာမရဘူးဆိုတာက ျမန္မာႏိုင္ငံကေနလုပ္ေနတယ္လို႕ facebook ကယူဆေတာ့ ဖုန္းနံပါတ္နဲ႕စစ္ေဆးေတာ့ ျမန္မာကေန လုပ္ရင္အဆင္မေျပဘူးျဖစ္ေနတယ္၊ ႏိုင္ငံျခားမွာရွိတဲ့ သူငယ္ခ်င္းဖုန္းကို အကူအညီေတာင္ျပန္ေတာ့လည္း တစ္ခုခုျဖစ္တိုင္း မယံုၾကည့္တဲ့အခါတိုင္ facebook က အဲဒီပထမဆံုးထည့္ထားတဲ့ ဖုန္းနံပါတ္ကို code ပို႕ေပးျပီး စစ္ေဆးေလးရွိတယ္ ဒီအတိုင္းလည္း သိပ္အဆင္မေျပဘူးေလ
ျပႆနာရွိရင္ ေျဖရွင္းနည္းလည္းရွိရမယ္ေလ၊
အဲဒါကေတာ့ ျမန္မာႏိုင္ငံမဟုတ္ဘဲ တျခားႏိုင္ငံကေန လုပ္တာပါလို႕ facebook
ကို မ်က္လွည့္ျပလိုက္ရံုဘဲေလ( သူက ျမန္မာႏိုင္ငံဆို ေသခ်ာစစ္တာကို)
အခုနည္းလုပ္ဖို႕အတြက္
(ဖုန္းကေန Gmail အေကာင့္လုပ္တာလြယ္တယ္ဆိုတာေတာ့ မိတ္ေဆြတိုင္းသိမယ္ထင္လို႕
မေျပာေတာ့ဘူးေနာ္)
1.
အရင္ဆံုး ကိုယ့္ဖုန္းထဲ့ကို ဒီေဆာဖ္၀ဲႏွစ္ခု ကို(1.EasyOvpn
2.OpenVPNConnect) ေဒါင္းျပီး
ကိုယ့္ဖုန္းထဲ့ကို အင္စေတာ့လုပ္လိုက္ပါ
2. EasyOvpn
ကိုဖြင့္လိုက္ရင္ ေအာက္ကပံုအတိုင္း ျမင္ရရင္
အေပၚဆံုးက Japan ကိုေရြးလိုက္ပါ

3. ဒါဆိုရင္ ေအာက္ကပံုေလးမွာ ပါတဲ့အတိုင္း Accept ကိုႏွိပ္ပါ

4.ေအာက္ကပံုေလးအတိုင္း
connect ကိုႏွိပ္လိုက္ပါ

5.၀ိုင္းျပထားတဲ့ေနရာေလးမွာ အမွတ္ျခစ္ေပးျပီး Ok ကိုႏွိပ္လိုက္ပါ

6.ဒီဆင့္မွာ
တကယ္လို႕ခ်ိတ္ဆက္လို႕မရဘဲ error တစ္ခုခုတက္လာခဲ့ရင္ အကြက္ေလးထဲက ip ကိုေျပာင္းေပးျပီး
connect ကိုထပ္ႏွိပ္ပါ။
 |
7.ဒါဆိုရင္
အခုလို Japan IP ကိုလွမ္းခ်ိတ္ေနပါျပီ

8.ေအာက္ကပံုမွာလို
ကၽြန္ေတာ္၀ိုင္းျပထားသလိုမ်ိဳး sing ျပျပီးဆိုရင္ facebook ကြ်န္ေတာ္တို႕ကို japan ႏိုင္ငံကေန သံုးေနျပီ ထင္သြားပါျပီ။
9. အဲလိုျဖစ္သြားျပီးဆိုရင္ေတာ့ ၾကိဳက္တဲ့ Browser
ကေန facebook ကို၀င္ျပီး create new
account ကိုႏွိပ္ျပီး ၾကိဳက္သေလာက္ လုပ္လို႕ပါျပီး( ကၽြန္ေတာ္ကေတာ့ UC browser ကိုသံုးပါတယ္

မွတ္ခ်က္။ facebook နာမည္ေတြ ျဖည့္တဲ့အခါ English နာမည္ေတြေပးမွ ပိုအဆင္ေျပတယ္ ခင္ဗ် ဥပမာ-Jon
Smit လိုမ်ိဳးေပါ့ ေနာက္ျပီး ေက်ာင္းေတြ တကၠသိုလ္ေတြဆိုရင္လည္း အစစာလံုးေလးတစ္လံုးရိုက္လိုက္တာနဲ႕
သူေရြးေပးတဲ့ ဟာေရြးတာက ပိုအဆင္ေျပတယ္ ေနာက္ျပီး တစ္ခါတည္း ဂ်ပန္က သူငယ္ခ်င္းေလး ငါးေယာက္လည္း
Add လိုက္အံုး၊ facebook pake ေလးႏွစ္ခုကိုလည္း Like လုပ္ေပးထားလိုက္အံုး အဲဒါဆိုရင္
ေတာ္ေတာ္ကို အဆင္ေျပသြားျပီခင္ဗ်
(ကြ်န္ေတာ္ကိုယ္တိုင္
အေကာင့္ႏွစ္ခုစမ္းသပ္ထားျပီးမွ ေသခ်ာေရးထားတာပါခင္ဗ် ကၽြန္ေတာ္မိတ္ေဆြေတြ သူမ်ားကိုယ္တိုင္ လုပ္တတ္ေစခ်င္၊
သူမ်ားကိုလည္း ျပန္ျပီးကူညီလို႕ရေအာင္ တစ္ခါမွ မေ၇းဖူးဘဲ ေရးထားလိုက္ပါတာ တစ္ခုခုလိုအပ္ခဲ့ရင္
နားလည္ေပးပါေနာ္)
Wednesday, July 3, 2013
How to use the KGB Archiver (compress 1 GB to 10 MB)
When you double-click on the KGB Archiver, this window will appear…

Make Sure, you select the “Compress files” and select “Next”

Add desired directory, which you want to compressed by clicking on “Add Directory” button.

Click on “…” button to locate the destination path


Compression Process will start and wait until it will finish

Tuesday, June 25, 2013
MSVCR100.dll error fixed

ဒီကို သြားပါေနာ္
Viber message ကို notification bar မွာ မေပၚေအာင္ လုပ္နည္း
When people send normal SMS texts, they are showing up in Viber as
well as my Android Messaging service. To stop SMS texts showing up in
both Viber and Android Messaging:
- Log into Viber on your Android
- Click the Menu button then More Options
- Click Settings
- Deselect Free reply with Viber (When possible, use Viber for SMS replies)
- Back out of Viber (This will auto save your settings)
Sunday, June 16, 2013
Android app ေတြ update လုပ္လို့မရရင္
ဒီ link အတိုင္း လုပ္ပ္
Android Fix: Insufficient storage available while updating Chrome via Google play
4 Replies
At some point, most android users will encounter the “insufficient storage available” error while updating their apps through Google Store. This error appears while updating or installing some apps in the Google Play Store. Many users have encountered insufficient storage available while updating Chrome. Though you have more than 1 GB of available storage, you might still get the insufficient storage error while trying to download a meager 24 MB of Google Chrome update. At the same time, a massive 500mb of game might download just fine from the Google Play Store. Here are two methods to fix this problem for Chrome or any other app you are trying to update/install:
Method 1: Clear data and cache:
- Go to settings->apps.
- Select Chrome and click on clear Data and Clear Cache.
- Apply the update via Google Play Store
Method 2: Deleting .odex file Sometimes the insufficient space error might be because of .odex files. To solve this issue, first uninstall previous version of the app. Then use root explorer or file explorer to access your Android’s internal storage or SDcard. From there, open “Data” folder->open “app” folder->browse and select the respective .odex file of the app you are trying to install/update. Now reinstall or update the app via Google Play Store.
Monday, June 3, 2013
FireFox မွာ သန္႔ရွင္းေရးလုပ္ရေအာင္
တခါတေလ cooki ေတြရွိေနရင္ အေကာင့္သစ္ေတြလုပ္ရတာအဆင္မေျပျဖစ္ေနရင္ သန့္ရွင္းေရးလုပ္လိုက္ရင္ အဆင္ေျပသြားတတ္တယ္ ဒါေၾကာင့္ လုိရမယ္ရေပါ့ဗ်
How do I clear my history?
- At the top of the Firefox window, click the button, go over to the menu and select .
-
- Select how much history you want to clear:
- Click the drop-down menu next to Time range to clear to choose how much of your history Firefox will clear.
- Next, click the arrow next to Details to select exactly what information will get cleared. Your choices are described in the What things are included in my history? section above.
- Finally, click the button and the window will close and the items you've selected will be cleared.


How do I make Firefox clear my history automatically?
If you need to clear your history every time you use Firefox, you can set it to happen automatically on exit so you don’t forget.- At the top of the Firefox window, click on the button and then select
- Select the panel.
- Set Firefox will: to Use custom settings for history.

- Check the box for Clear history when Firefox closes.

- To specify what types of history should be cleared, click the button next to Clear history when Firefox closes.
- In the Settings for Clearing History window, check the items that you want to have cleared automatically each time you quit Firefox.

- After selecting the history to be cleared, click to close the Settings for Clearing History window.
- Click to close the Options window
Clear the cache
- At the top of the Firefox window, click on the button and then select
- Select the panel.
- Click on the Network tab.
- In the Cached Web Content section, click .
-
- Click to close the Options window
Automatically clear the cache
You can set Firefox to automatically clear the cache when Firefox closes:
- At the top of the Firefox window, click on the button and then select
- Select the panel.
- In the History section, set Firefox will: to Use custom settings for history.
- Select the check box for Clear history when Firefox closes.

- Beside Clear history when Firefox closes, click the button. The Settings for Clearing History window will open.
- In the Settings for Clearing History window, click the check mark box next to Cache.

- For more information on the other options, see Remove recent browsing, search and download history .
- Click to close the Settings for Clearing History window.
- Click to close the Options window

Sunday, June 2, 2013
Huawei G-510 မွာ viber မရဘူးျဖစ္ေနရင္
G 510 မွာ viber က သူမ်ားကိုလည္း ေခၚ္လို႔မရ နားေထာင္လို႔လည္း မရ ျဖစ္ေနရင္
Viber 2.2.222.apk ကို ေျပာင္းေပးလိုက္ပါ အဆင္ေျပသြားလိမ့္မယ္ version ျမင့္ရင္ မရဘူး
Viber 2.2.222.apk ကို ေျပာင္းေပးလိုက္ပါ အဆင္ေျပသြားလိမ့္မယ္ version ျမင့္ရင္ မရဘူး
Sunday, May 26, 2013
Browser မွာ ျမန္မာစာေကာင္းေကာင္းျမင္ခ်င္ရင္
Add on မွာ
myanmarfonttagger လို႔ရွာျပီး အင္စေတာလုပ္ထားလိုက္ ဒါဆို
အဆင္ေျပသြားပါလိမ့္မယ္
myanmarfonttagger လို႔ရွာျပီး အင္စေတာလုပ္ထားလိုက္ ဒါဆို
အဆင္ေျပသြားပါလိမ့္မယ္
Saturday, May 25, 2013
Youtube မွ video မ်ားကို IDM ျဖင့္ အဆင္မေျပရင္
ဒီေန႔ Youtube က video မ်ားကို ေဒါင္းမရတာနဲ႔
၁။ Easy Youtube Downloader add on ေလးကို အရင္ add လိုက္ပါ
၂။ ျပီးမွ IDM နဲ႕ ေဒင္းရင္ အဆင္ေျပပါျပီ
၁။ Easy Youtube Downloader add on ေလးကို အရင္ add လိုက္ပါ
၂။ ျပီးမွ IDM နဲ႕ ေဒင္းရင္ အဆင္ေျပပါျပီ
Saturday, March 16, 2013
how to download videos from facebook
facebook video လင့္ကို copy ယူျပီး ေအာက္ပါဆိုဒ္ကို သြာလိုက္ပါ
ဒီဆိုဒ္ပါ
download ေရွ့က အကြက္ထဲမွာ ကူးလာတဲ့ လင့္ကို past ခ်လိုက္ပါ
ခဏေလးေစာင့္ပါ
ေအာက္မွာ Download This video ဆိုတဲ့စာတန္းေပၚမွာ ႏွိပ္ျပီး save လိုက္ပါ
ဒါဆို ကြန္ျပဴတာကို ေရာက္သြာပါျပီ
ဒီဆိုဒ္ပါ
download ေရွ့က အကြက္ထဲမွာ ကူးလာတဲ့ လင့္ကို past ခ်လိုက္ပါ
ခဏေလးေစာင့္ပါ
ေအာက္မွာ Download This video ဆိုတဲ့စာတန္းေပၚမွာ ႏွိပ္ျပီး save လိုက္ပါ
ဒါဆို ကြန္ျပဴတာကို ေရာက္သြာပါျပီ
Wednesday, March 13, 2013
windows ေပၚမွာ photos ေတြဟာ icon အေနနဲ႔ဘဲေပၚေနျပီး ဓါတ္ပံုအတိုင္းမျမင္ရဘူးဆိုရင္
to simply make your pictures show in thumbnail mode in win7
simply open your pictures folder,
click tools,
folder options,
view,
then uncheck "Always show icons, never thumbnails"
simply open your pictures folder,
click tools,
folder options,
view,
then uncheck "Always show icons, never thumbnails"
Tuesday, March 12, 2013
How to change Appstore on iPhone/ipad
ကိုယ္လုပ္ထားတဲ့ apple ID က US ကိုယ့္ဖုန္းထဲမွာ setting ထားတဲ့ store က singapore store အဲဒါမ်ိဳးျဖစ္ရင္ ကိုယ္လိုခ်င္တဲ့ application ေတြကို ေဒါင္းလို႔မရ sign in လုပ္လို႔မရ ျဖစ္ေနတတတ္ပါတယ္ အဲဒါဆိုရင္ appstore ကို US store ကို ျပန္ေျပာင္းေပးရပါတယ္
ေျပာင္းနည္းကေတာ့
1. setting>iTunes & App Store>
2. အဲဒီမွာ အေကာင့္က ၀င္ျပီးသားဆိုရင္းလည္း Sign out လုပ္လိုက္ပါ
3. အဲဒါျပီးမွ Create New ကို ႏွိပ္လိုက္ပါ။
4. အဲဒီမွာ store ေနရာမွာ US store ကိုေရြးျပီးျပန္ထြက္လိုက္ပါ။
5. အဲဒါျပီးရင္ မိမိလုပ္ျပီးသား US ID ကို သံုးလို႔ရပါျပီး
မွတ္ခ်က္။။ ဒီလုပ္ငန္စဥ္ေတြကို လုပ္တဲ့အခ်ိန္မွာ internet ဖြင့္ထားဖို႔ေတာ့လိုတယ္ေနာ္။
Saturday, March 9, 2013
3 Free Cydia Apps to Change iPhone’s Carrier Name Read more: http://www.callingallgeeks.org/3-free-cydia-apps-to-change-iphones-carrier-name/#ixzz2N7RolMXu Under Creative Commons License: Attribution No Derivatives
When you see a custom name instead of the operator’s name on anyone’s
iPhone or screenshots on the internet, you might have wondered how do
they do this. This tutorial will show you three free cydia apps that can
change iPhone’s carrier name. Now you can change it to any fake carrier
name or even your own name. We have tested these to work on the latest
versions of iOS including iOS 6.1.1.

While it does not need a reboot or respring to change iPhone’s carrier name, you do need to quit Settings for the changes to take effect. Works perfectly with iOS 4.3.1+

 It can be downloaded for free via Cydia. Since, it is hosted on the
BigBoss repo no need to add any new repo to Cydia. Just search for Fake
Operator using the search tab.
It can be downloaded for free via Cydia. Since, it is hosted on the
BigBoss repo no need to add any new repo to Cydia. Just search for Fake
Operator using the search tab.


 Again no extra Repo needs to be added as it is hosted on BigBoss repo. Just go to Cydia and search for FakeCarrier.


 You can install MakeItMine from the ModMyI repo, which is a default repo in Cydia.

 Do let us know, which is your favorite fake carrier application for iPhone and what did you finally change the carrier name to?
1. Fake Operator
This application does not have any icon for itself. You need to configure it through the settings app on your iPhone.While it does not need a reboot or respring to change iPhone’s carrier name, you do need to quit Settings for the changes to take effect. Works perfectly with iOS 4.3.1+
2. FakeCarrier
This app is similar to Fake Operator in functionality. It does have
its own icon but that’s not why I like this the most. The good part is
that you do not have to quit the app for the changes to be effective.
Just type fake carrier name and tap on set to apply it. I have tested
FakeCarrier to work on the latest iOS version 4.3.1 on iPhone 4.
3. MakeItMine
MakeItMine is an app by Erica Sadun. Since, this app hasn’t been
updated in a while it does not work for iOS version 4.2 and later. Also,
it requires you to respring iPhone for changes to take effect. Even
though respring feature is included, it is inconvenient compared to the
previous two apps.How to Enable iPhone Internet Tethering?
On your iPhone, Go to Settings > General > Network and select Internet Tethering


Once you set the switch to On you will be asked whether you want to enable tethering on USB only or USB + Bluetooth. If you select the second option Bluetooth will be turned on in case it was off. A bluetooth icon will appear in your status bar at the top.

In case Bluetooth was already On, tethering will be enabled automatically on Bluetooth and USB. Whether you use tethering over Bluetooth or USB tethering the speed will be the same. If you are travelling use Bluetooth as it consumes much less power.

Now that you have enabled Tethering on your iPhone either connect it your Mac or Windows laptop using the USB cable or just pair it over bluetooth to start accessing the internet.
Windows: Right click on the Bluetooth icon in your taskbar and select connect to Bluetooth PAN network. These options may vary depending on the manufacturer or your Bluetooth software.
Once your computer is connected you will see a new blue bar appear on your iPhone screen at the top stating that iPhone Internet Tethering is active. You can just disconnect tethering from your computer and do not need to disable it every now and then.

In fact, while travelling I don’t even need to take out the phone from my pockets. I keep the bluetooth radio On always since it doesn’t consume much power. Whenever, I need to access the internet on my laptop I connect it from the laptop’s bluetooth menu in a one click process.
Wi-fi tethering in the form of Mobile Hotspot is coming to iPhone in March when iOS 4.3 is released. Read more about it here.
Let us know if you found this tutorial useful and if you have any questions or difficulties with internet tethering on your iPhone.
Once you set the switch to On you will be asked whether you want to enable tethering on USB only or USB + Bluetooth. If you select the second option Bluetooth will be turned on in case it was off. A bluetooth icon will appear in your status bar at the top.
In case Bluetooth was already On, tethering will be enabled automatically on Bluetooth and USB. Whether you use tethering over Bluetooth or USB tethering the speed will be the same. If you are travelling use Bluetooth as it consumes much less power.
Now that you have enabled Tethering on your iPhone either connect it your Mac or Windows laptop using the USB cable or just pair it over bluetooth to start accessing the internet.
Bluetooth Pairing Instructions:
Mac: Go to Bluetooth menu in top status bar and
select Set up bluetooth device to pair iPhone. Once pairing is done.
Select your iPhone from list of devices and click on Connect to Network.Windows: Right click on the Bluetooth icon in your taskbar and select connect to Bluetooth PAN network. These options may vary depending on the manufacturer or your Bluetooth software.
Once your computer is connected you will see a new blue bar appear on your iPhone screen at the top stating that iPhone Internet Tethering is active. You can just disconnect tethering from your computer and do not need to disable it every now and then.
In fact, while travelling I don’t even need to take out the phone from my pockets. I keep the bluetooth radio On always since it doesn’t consume much power. Whenever, I need to access the internet on my laptop I connect it from the laptop’s bluetooth menu in a one click process.
Wi-fi tethering in the form of Mobile Hotspot is coming to iPhone in March when iOS 4.3 is released. Read more about it here.
Let us know if you found this tutorial useful and if you have any questions or difficulties with internet tethering on your iPhone.
How to Save SHSH Blobs for iOS 6.1
How to Save SHSH Blobs for iOS 6.1
- Download TinyUmbrella;
- Run the downloaded TinyUmbrella file. It may take a few seconds to fully initialize;
- Connect your iPhone, iPad or iPod Touch that you want to save your SHSH blobs for. We suggest you to do this for all your iOS 6.1 compatible devices;
- Select your device from the left-pane, under connected devices, on Tinyumbrella;
- Now click on the Advanced tab, and uncheck the following two options:
- Save ALL Available SHSH
- Request SHSH From Cydia
- You can also change the save directory (under Advanced tab) to your desired one e.g. to your desktop, that way you can easily find, verify and backup SHSH blobs with TinyUmbrella;
- Now click on the Log tab where you’ll be able to see the status of your save attempt. Click the Save SHSH button, TinyUmbrella will attempt to save SHSH blobs for the latest firmware i.e. iOS 6.1 to the save directory you selected above. If saved successfully, the Log tab will contain a message saying SHSH SUCCESSFULLY SAVED;
- Now click on the General tab, the iOS 6.1 blobs should appear in the list.
That’s it! you’ve successfully save SHSH blobs for iOS 6.1 for your iPhone, iPad or iPod Touch
How To Unlock iPhone 4 or 3G/3GS with Ultrasn0w [iOS 4.0/4.0.1] Read more: http://www.callingallgeeks.org/how-to-unlock-iphone-4-or-3g3gs-with-ultrasn0w-ios-4-04-0-1/#ixzz2N7Ji8Ywj Under Creative Commons License: Attribution No Derivatives
he Jailbreak for iPhone 4 and all other iPhones running iOS 4 has already been released online at Jailbreakme.com
by Comex in a way few had expected. Now following that here’s the
unlock solution for you all. Use your iPhone 3G/ 3GS/ 4 with any carrier
worldwide with this unlock.
This guide has actually been tested on the said devices and works like a charm. The unlock via Ultrasn0w will work on your iPhone 3G, iPhone 3GS and iPhone 4 with almost any baseband. However do make sure that your baseband is one of the following:
Go to Settings > General > About > Modem Firmware to get this info.
iPhone 3G / 3GS Basebands:
 Steps to follow:


 Make sure you have a working wifi or data connection before you click
on Confirm as Cydia will try to download the app. Once the process is
over the Reboot Device button will appear. Click on it and wait for your
iDevice to restart. And you’re done. While it restarts you may put in
any other sim card other than the carrier the phone was locked to. It
worked the first time for me and without any issues. The network search is pretty fast and takes around 15 seconds maximum to register network.
Make sure you have a working wifi or data connection before you click
on Confirm as Cydia will try to download the app. Once the process is
over the Reboot Device button will appear. Click on it and wait for your
iDevice to restart. And you’re done. While it restarts you may put in
any other sim card other than the carrier the phone was locked to. It
worked the first time for me and without any issues. The network search is pretty fast and takes around 15 seconds maximum to register network.
 Go ahead and unlock your iPhone. Let us know if you run into any issues. We might be able to lend a helping hand as always.
This guide has actually been tested on the said devices and works like a charm. The unlock via Ultrasn0w will work on your iPhone 3G, iPhone 3GS and iPhone 4 with almost any baseband. However do make sure that your baseband is one of the following:
Go to Settings > General > About > Modem Firmware to get this info.
iPhone 3G / 3GS Basebands:
- 04.26.08
- 05.11.07
- 05.12.01
- 05.13.04
- 01.59.00
- Launch Cydia
- Click on Manage tab
- Click on Sources. Click on the Repo that reads “repo666.ultrasn0w.com”. If its not present click on Edit and then Add. Type the URL without quotes.
- Click on Ultrasn0w and then on the Install button.
- Finally, Click on Confirm
How to Chack iPhone models
Be sure you have the latest version of iTunes software. To check your iTunes version on a Mac, choose iTunes > Check for Updates. In Windows, choose Help > Check for Updates.
To ensure that your Mac or PC is compatible with your iPhone, check the system requirements for your model.
To ensure that your Mac or PC is compatible with your iPhone, check the system requirements for your model.
| Icon | Model | Year Introduced | Model Number* | Capacity |
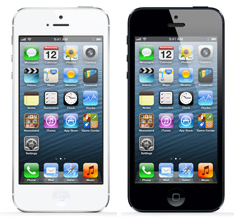 |
iPhone 5 (GSM model) | 2012 | A1428 | 16, 32, and 64 GB |
|
iPhone 5 (GSM and CDMA models) | 2012 | A1429 | 16, 32, and 64 GB |
|
iPhone 5 (CDMA China) | 2012 | A1442 | 16, 32, and 64 GB |
 |
iPhone 4S | 2011 | A1387 | 16, 32, and 64 GB |
|
iPhone 4S (GSM China) | 2011 | A1431 | 16, 32, and 64 GB |
 |
iPhone 4 (CDMA model) | 2011 | A1349 | 8, 16 and 32 GB |
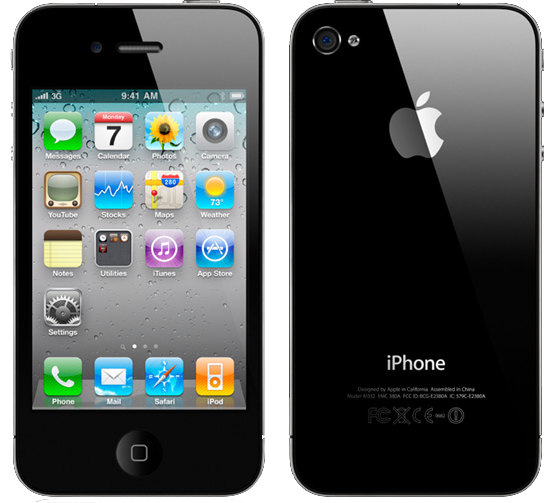 |
iPhone 4 (GSM model) | 2010 | A1332 | 8, 16 and 32 GB |
| iPhone 3GS (China) | 2009 | A1325 | 8, 16 and 32 GB | |
| iPhone 3GS | 2009 | A1303 | 8, 16 and 32 GB | |
| iPhone 3G (China) | 2009 | A1324 | 8 and 16 GB | |
| iPhone 3G | 2008 | A1241 | 8 and 16 GB | |
| iPhone | 2007 | A1203 | 4, 8, and 16 GB | |
| * You can find the model number on the iPhone's back case. | ||||
Subscribe to:
Posts (Atom)